| 일 | 월 | 화 | 수 | 목 | 금 | 토 |
|---|---|---|---|---|---|---|
| 1 | 2 | 3 | 4 | |||
| 5 | 6 | 7 | 8 | 9 | 10 | 11 |
| 12 | 13 | 14 | 15 | 16 | 17 | 18 |
| 19 | 20 | 21 | 22 | 23 | 24 | 25 |
| 26 | 27 | 28 | 29 | 30 | 31 |
- leetcode
- 스위프트
- 책 후기
- 스위프트UI
- rxswift
- objc
- ios
- 머신러닝
- RX
- 독서
- Xcode
- swift5
- Algorithm
- objective-c
- swiftUI
- wwdc
- 문자열
- stanford SwiftUI
- 알고리즘
- Deep learning
- 책
- SWIFT
- Animation
- iOS SwiftUI
- ReactiveX
- 애니메이션
- string
- ARC
- 딥러닝
- 책 추천
- Today
- Total
THIS IS ELLIE
SwiftUI - Alert 본문
안녕하세요 오늘은 얼럿에 대해서 알아보겠습니다.
얼럿은 iOS15에서 업데이트되었기 때문에
iOS 15 이상만 지원하면 되는지?
iOS 13,14도 지원해야하는지?
생각해보시고 상황에 따라 다르게 구현하면 됩니다.
먼저 iOS 15에서는요
modifier를 통해 얼럿을 생성할 수 있습니다.
struct ContentView: View {
@State private var showingAlert = false
var body: some View {
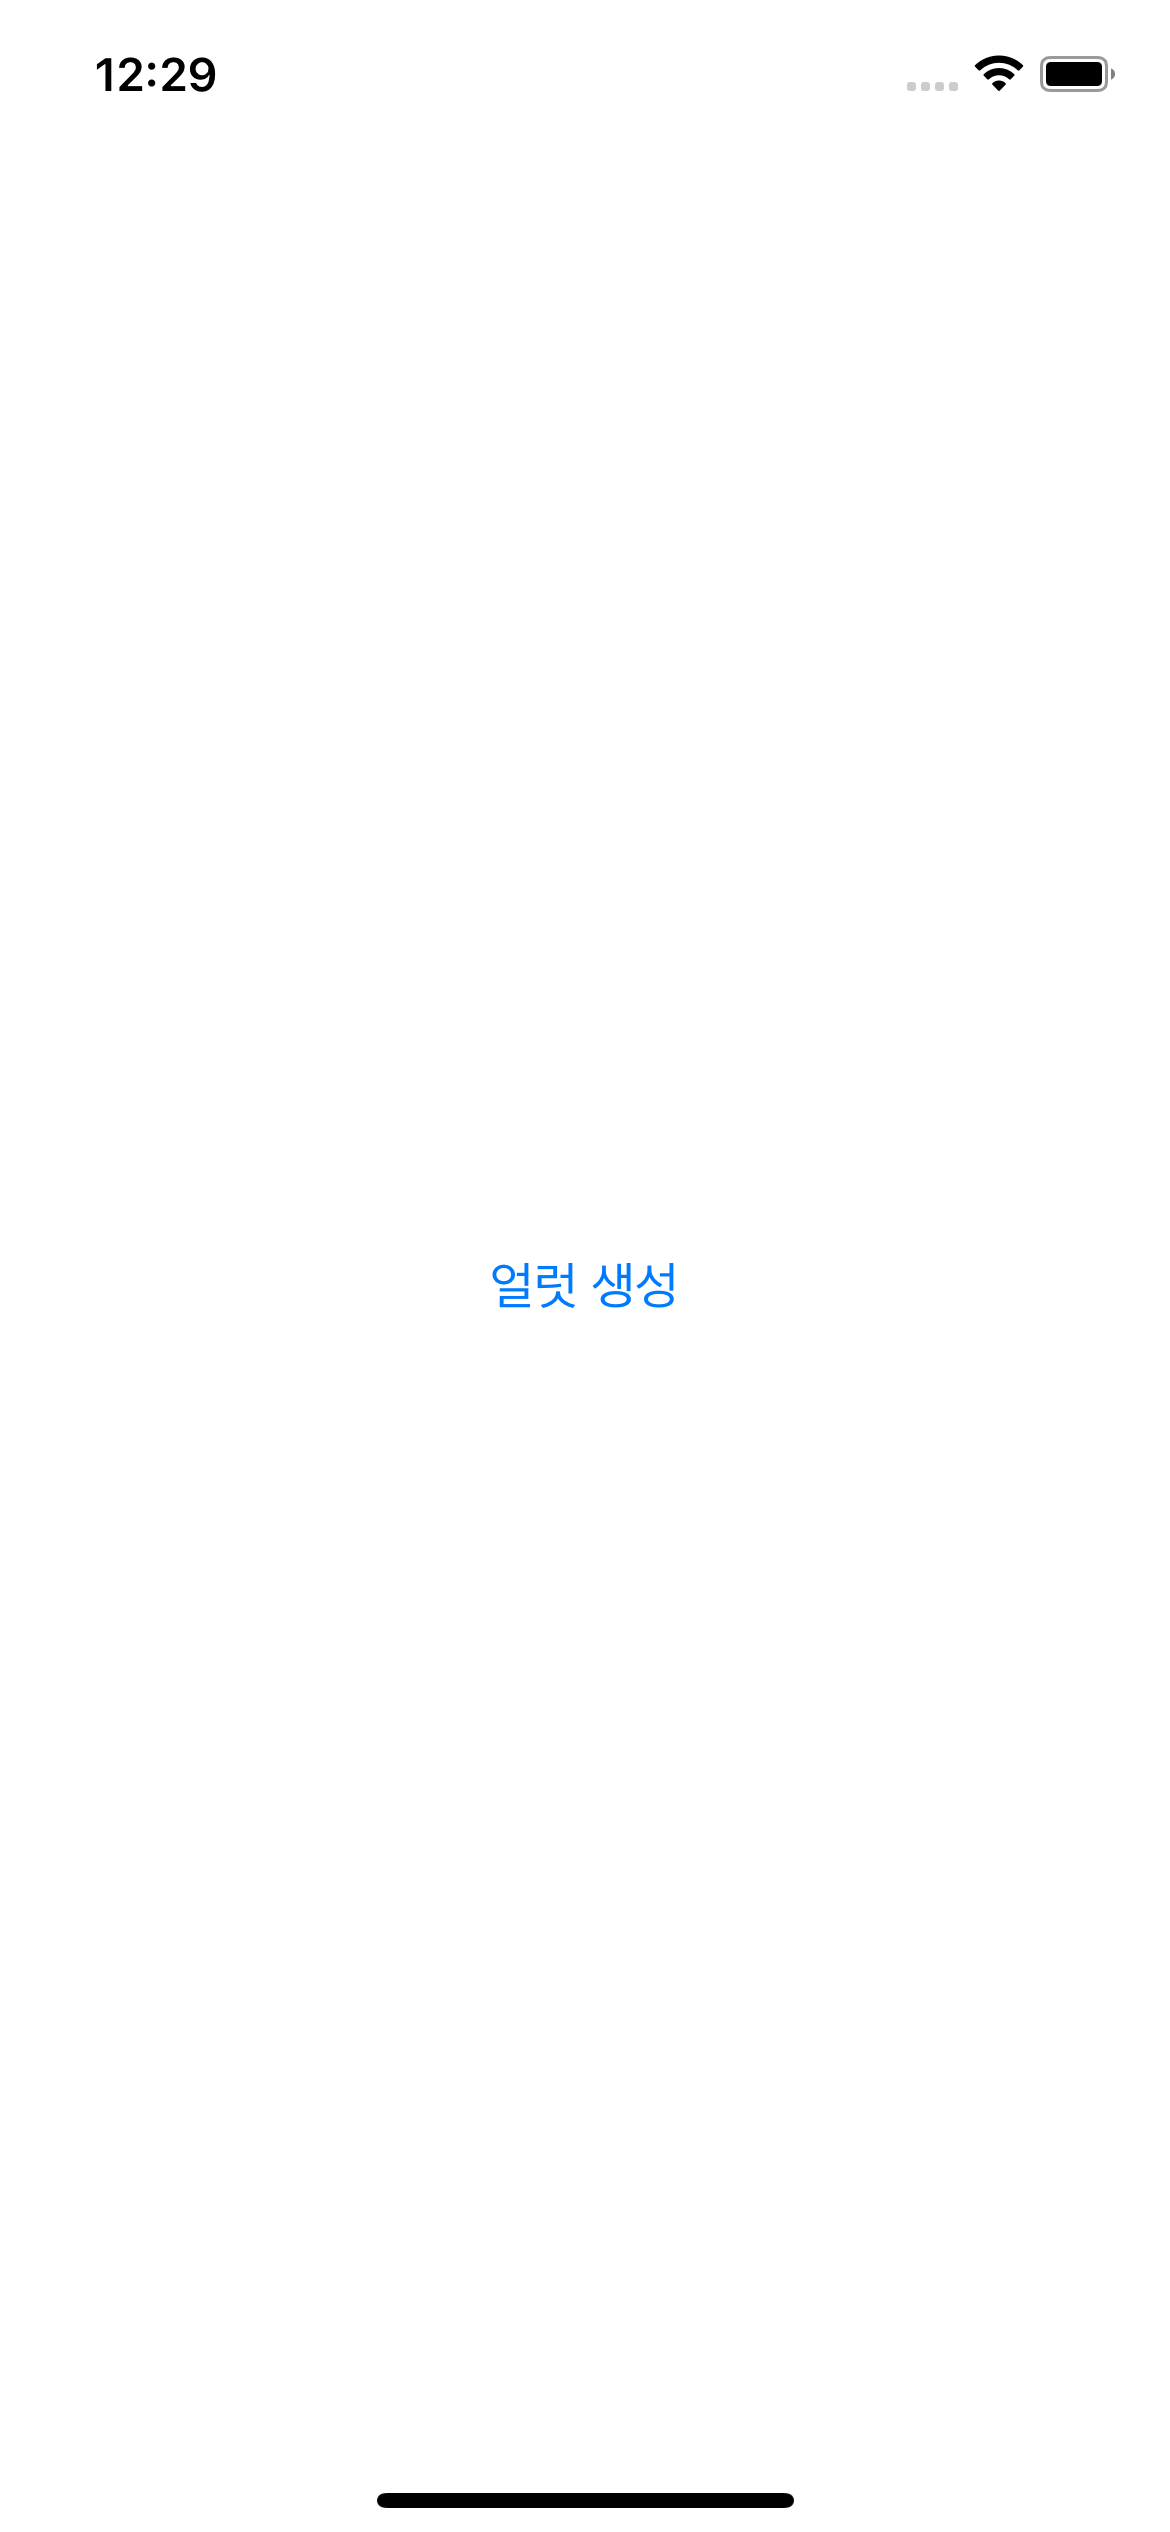
Button("얼럿 생성") {
showingAlert = true
}
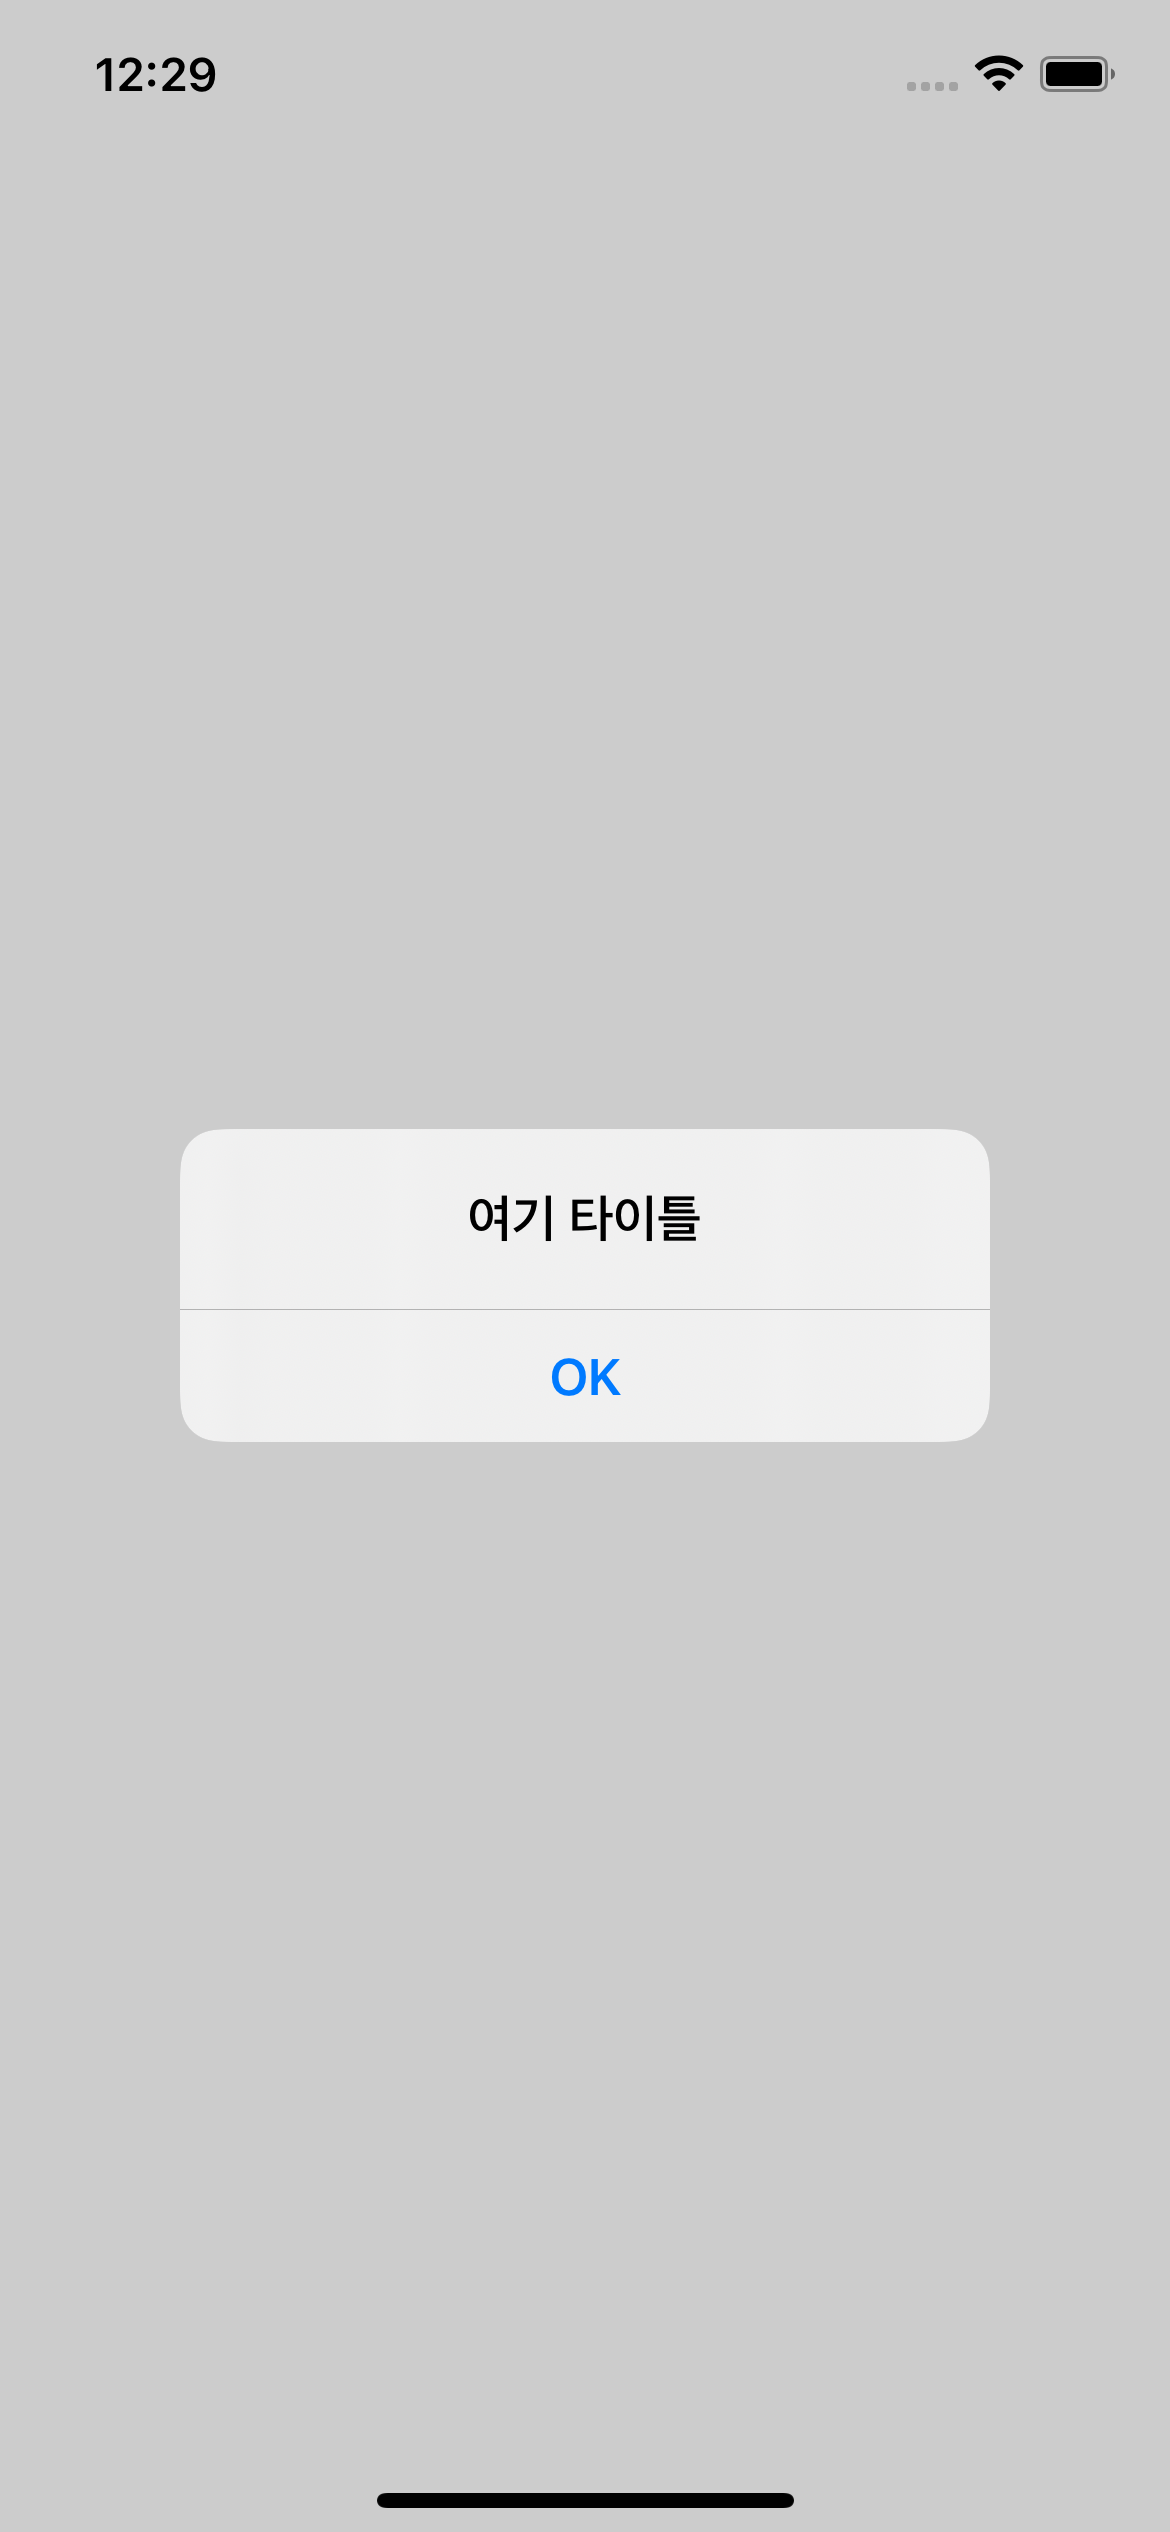
.alert("여기 타이틀", isPresented: $showingAlert) {
Button("OK", role: .cancel) {
print("OK 누름")
}
}
}
}
여기서
@State 프로퍼티 showingAlert 왜 있을까?
이 값이 변경됨에 따라서 뷰를 갱신시키기 때문!
@State 프로퍼티를 추가해서 얼럿이 노출될 때 이 프로퍼티를 true로 설정해주고
사용자가 얼럿을 해제하면 이 값은 자동으로 false로 변경되고 얼럿이 사라지게 됩니다.
= 바인딩
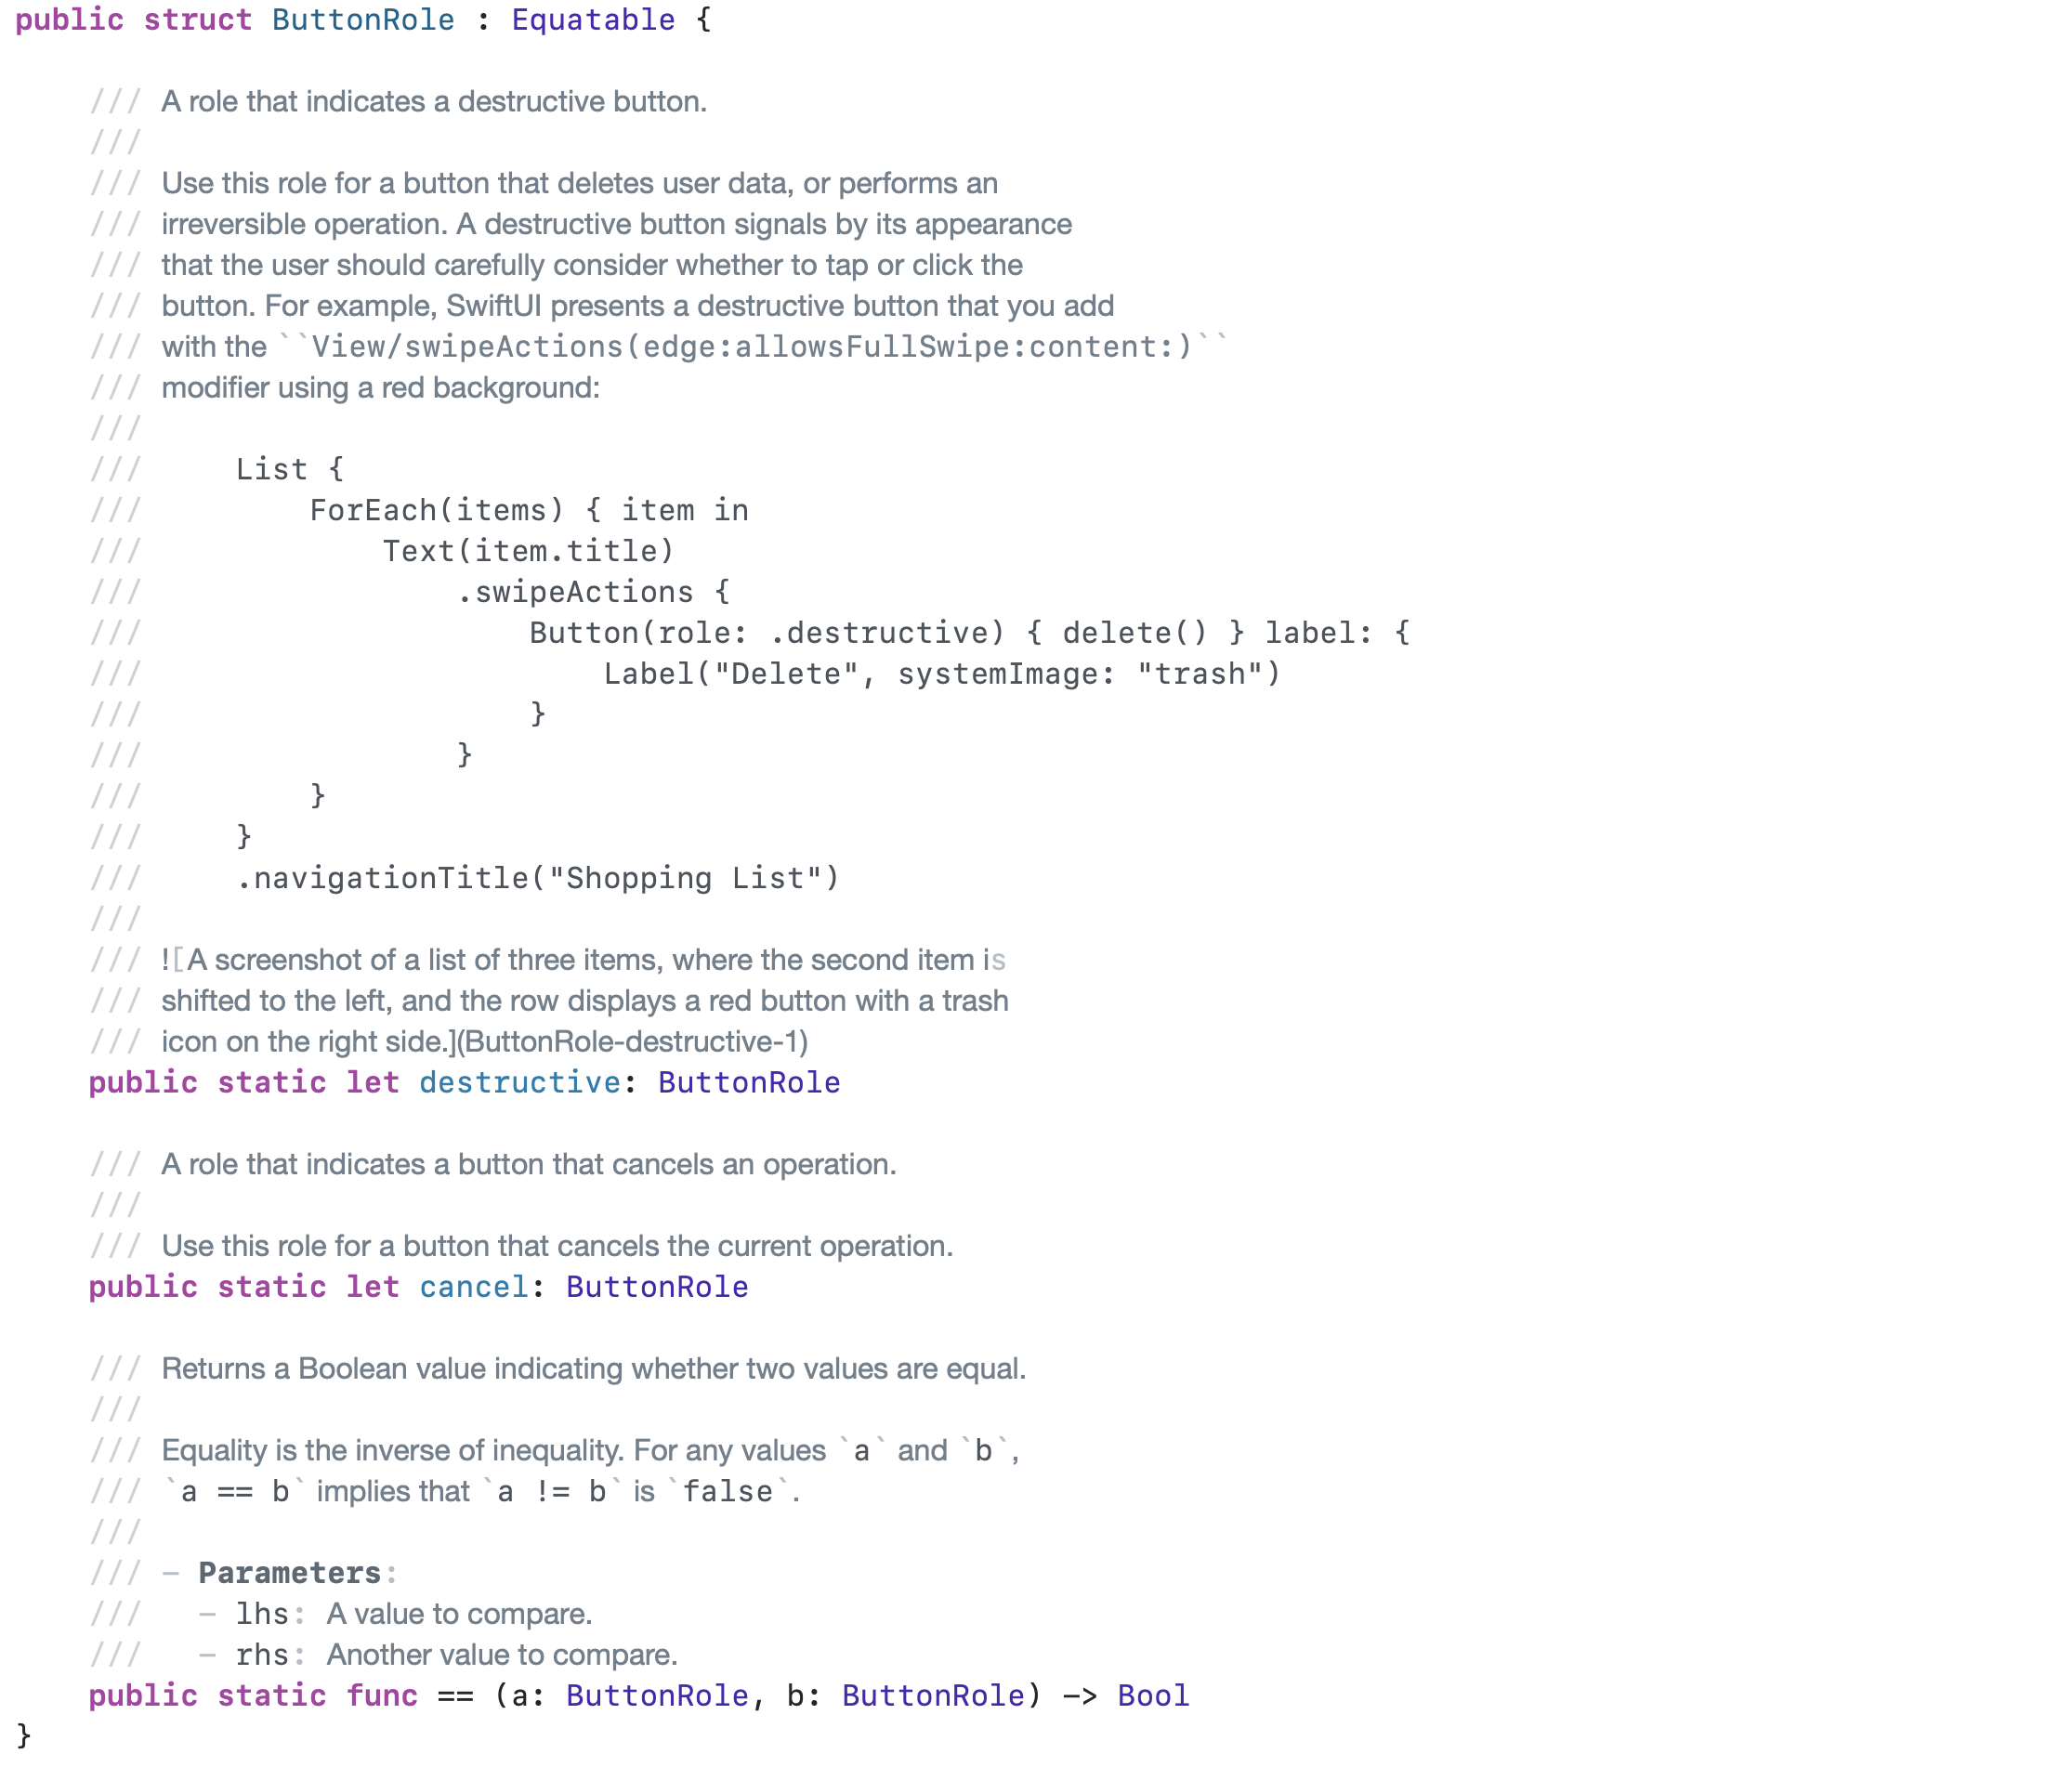
다음 버튼 Role
ButtonRole에 타고 들어가 보니까 cancel, destructive 이렇게 있었는데
이는 버튼의 역할 차이인 것 같습니다.
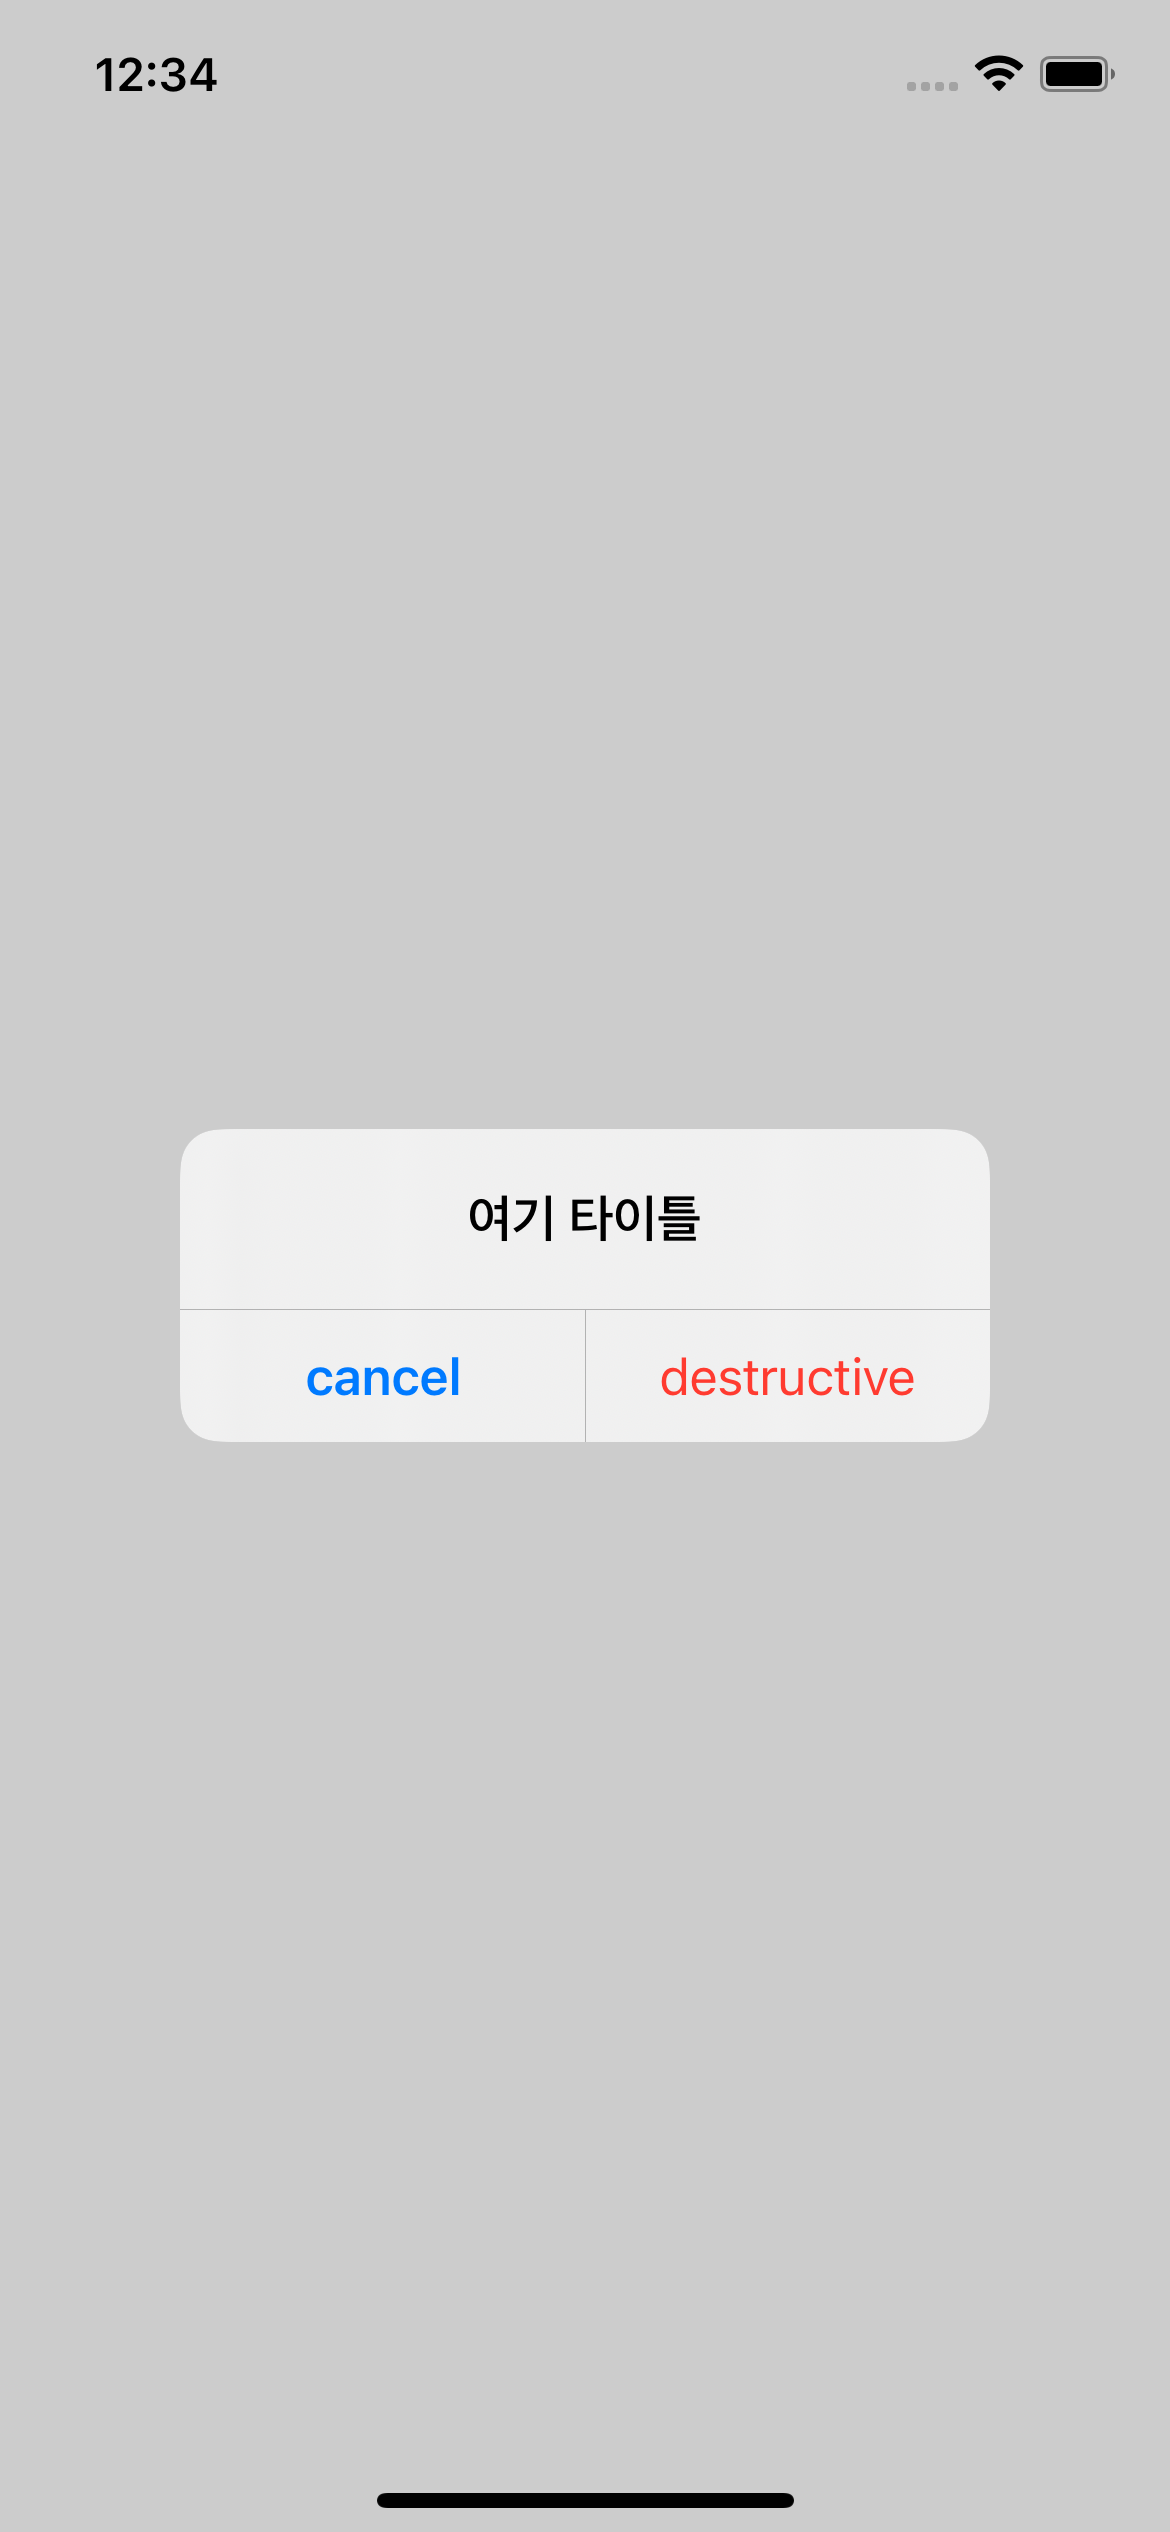
cancel은 왼쪽 destructive는 오른쪽으로 표현됩니다.
필요에 따라서 잘 사용하면 될 듯.
추가로
여러 개의 버튼을 표현하고 싶다면?
아래와 같이 클로저 안에 여러개의 버튼을 생성해주면 됩니다.
struct ContentView: View {
    @State private var showingAlert = false

     var body: some View {
         Button("얼럿 생성") {
             showingAlert = true
         }
         .alert("여기 타이틀", isPresented: $showingAlert) {
             Button("하나") { }
             Button("둘") { }
             Button("셋") { }
             Button("넷") { }
         }
     }
}
이건 테스트하다가 알게 된 사실인데
2개까지는 좌우로 버튼이 생기고
3개부터는 아래로 쭈루룩 생기네요
struct ContentView: View {
    @State private var showingAlert = false

     var body: some View {
         Button("얼럿 생성") {
             showingAlert = true
         }
         .alert("여기 타이틀", isPresented: $showingAlert) {
             Button("하나") { }
             Button("둘") { }
         }
     }
}
신기하다잉
다음
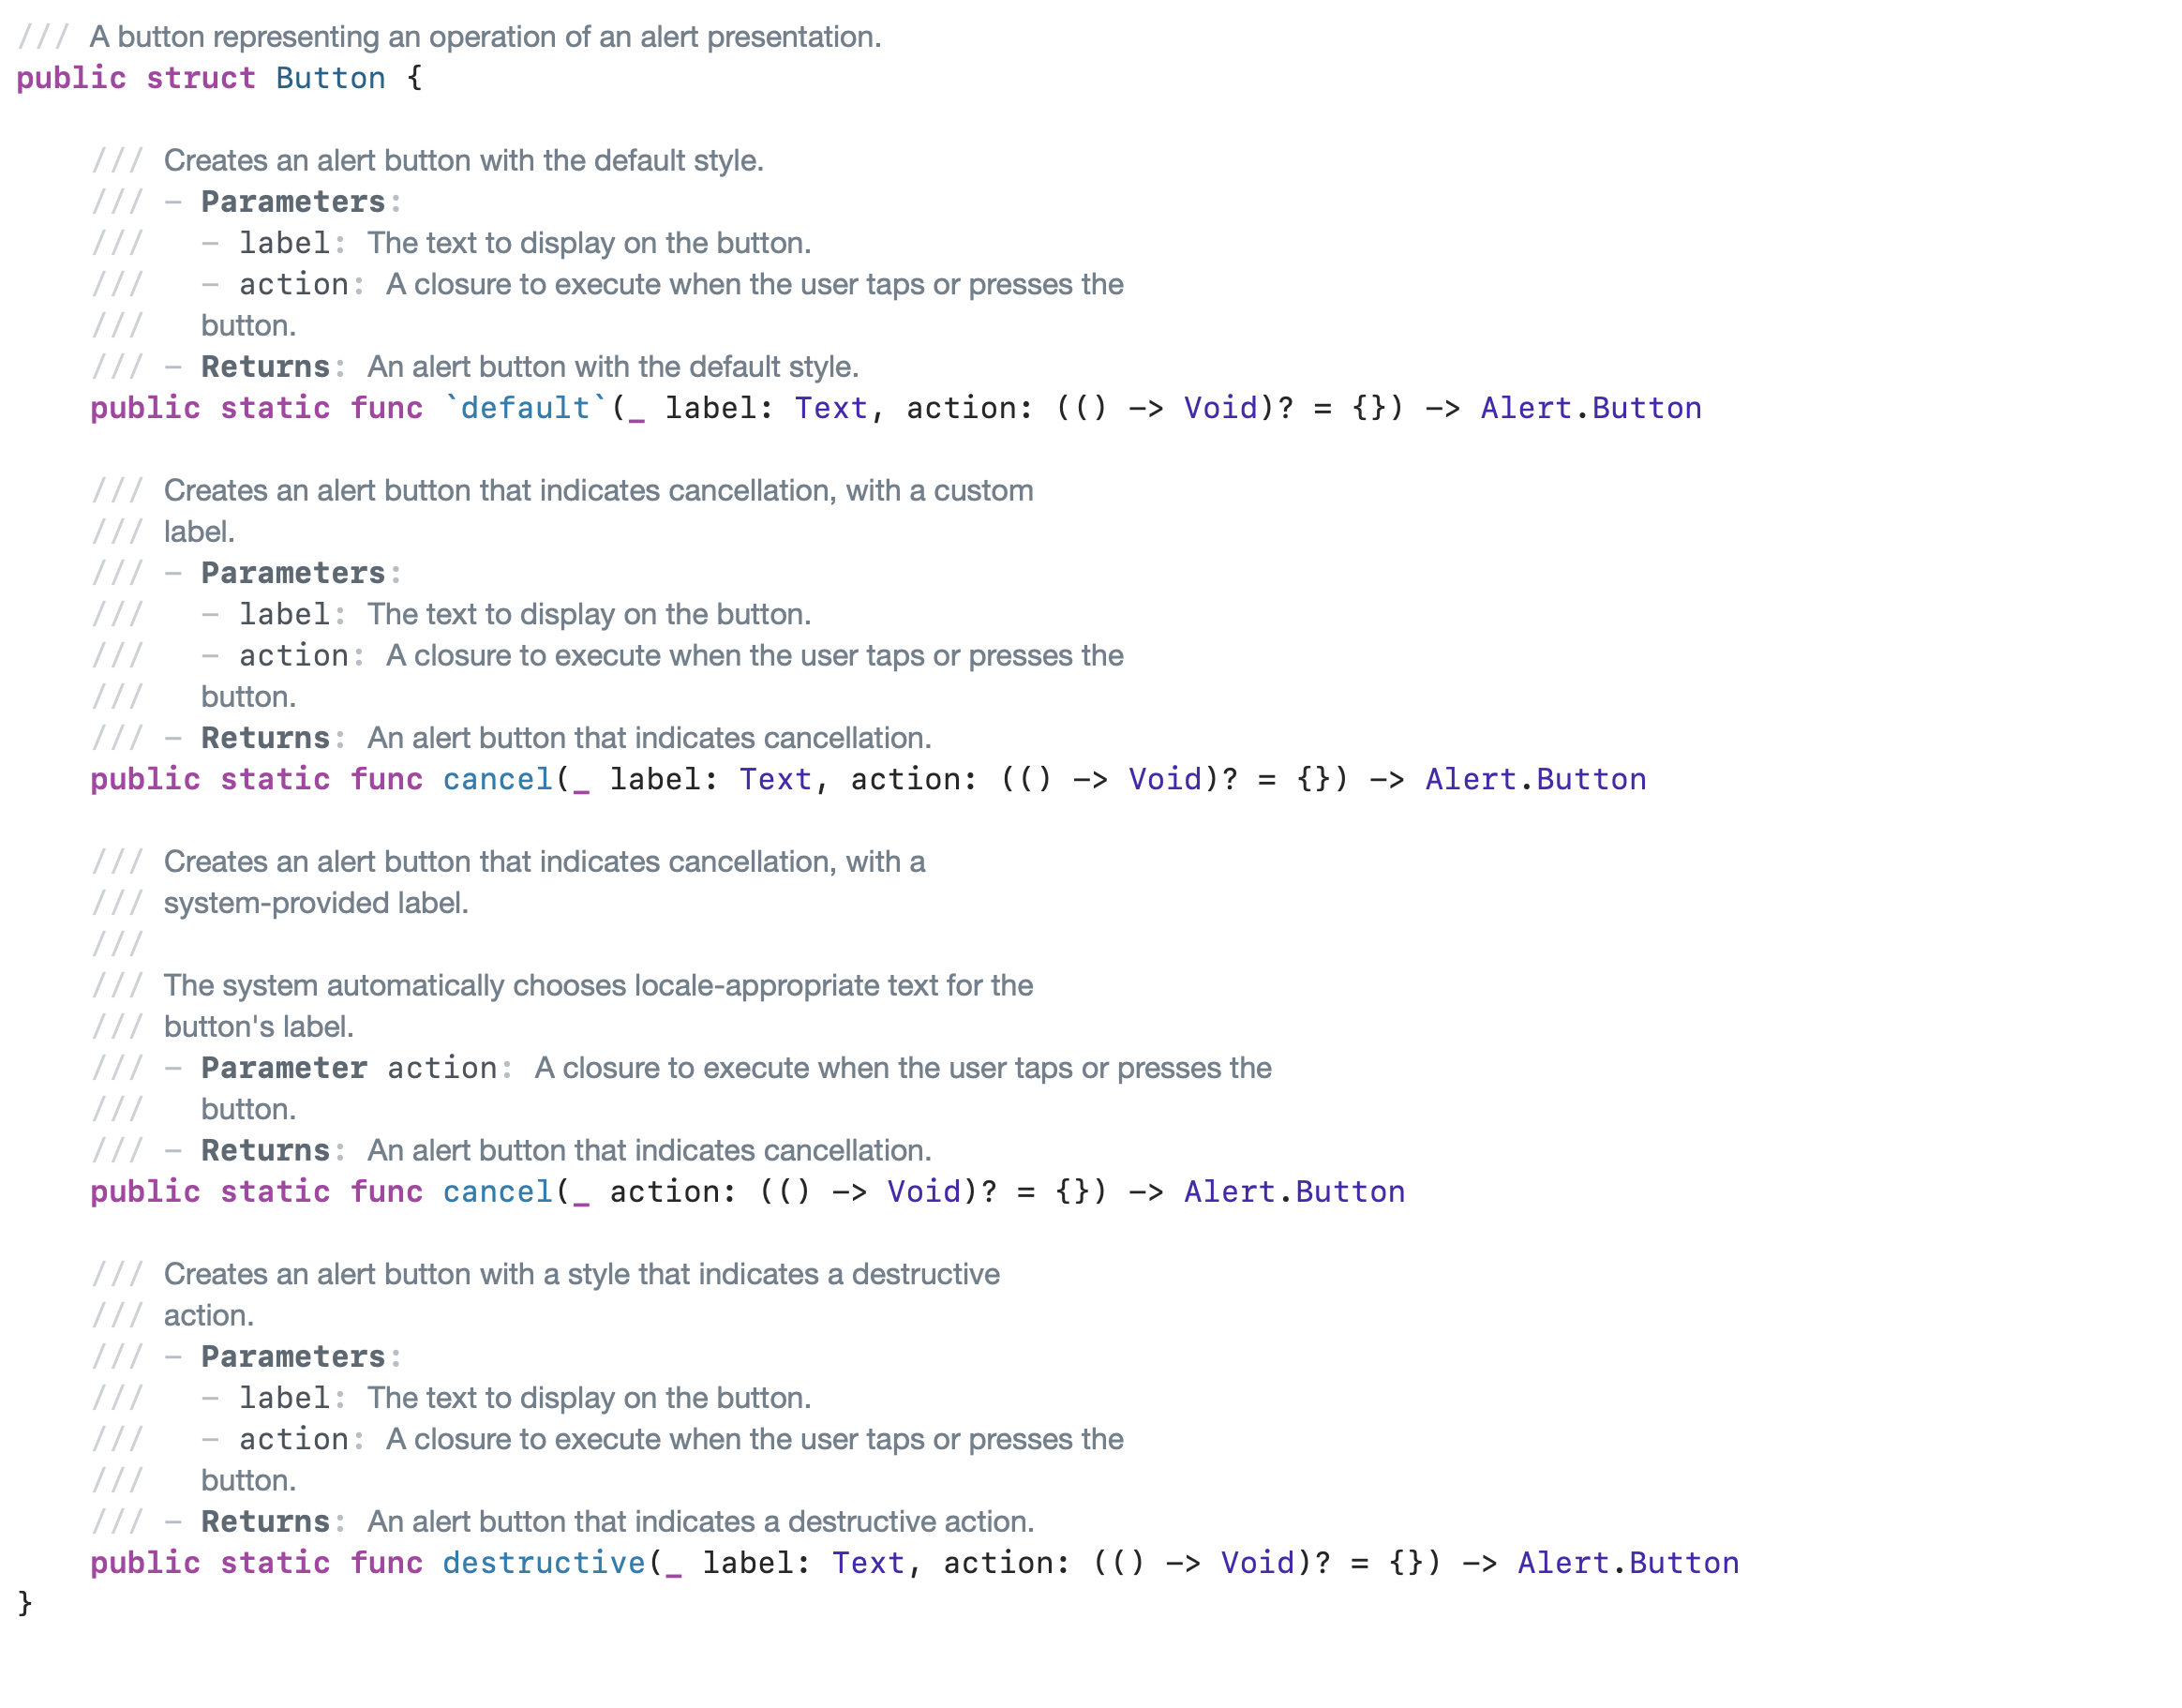
iOS 13, iOS 14 지원
위와 다르게 얼럿 구조체를 사용해야 합니다.
struct ContentView: View {
@State var showingAlert = false
var body: some View {
Button("얼럿 생성") {
showingAlert = true
}.alert(isPresented: $showingAlert) {
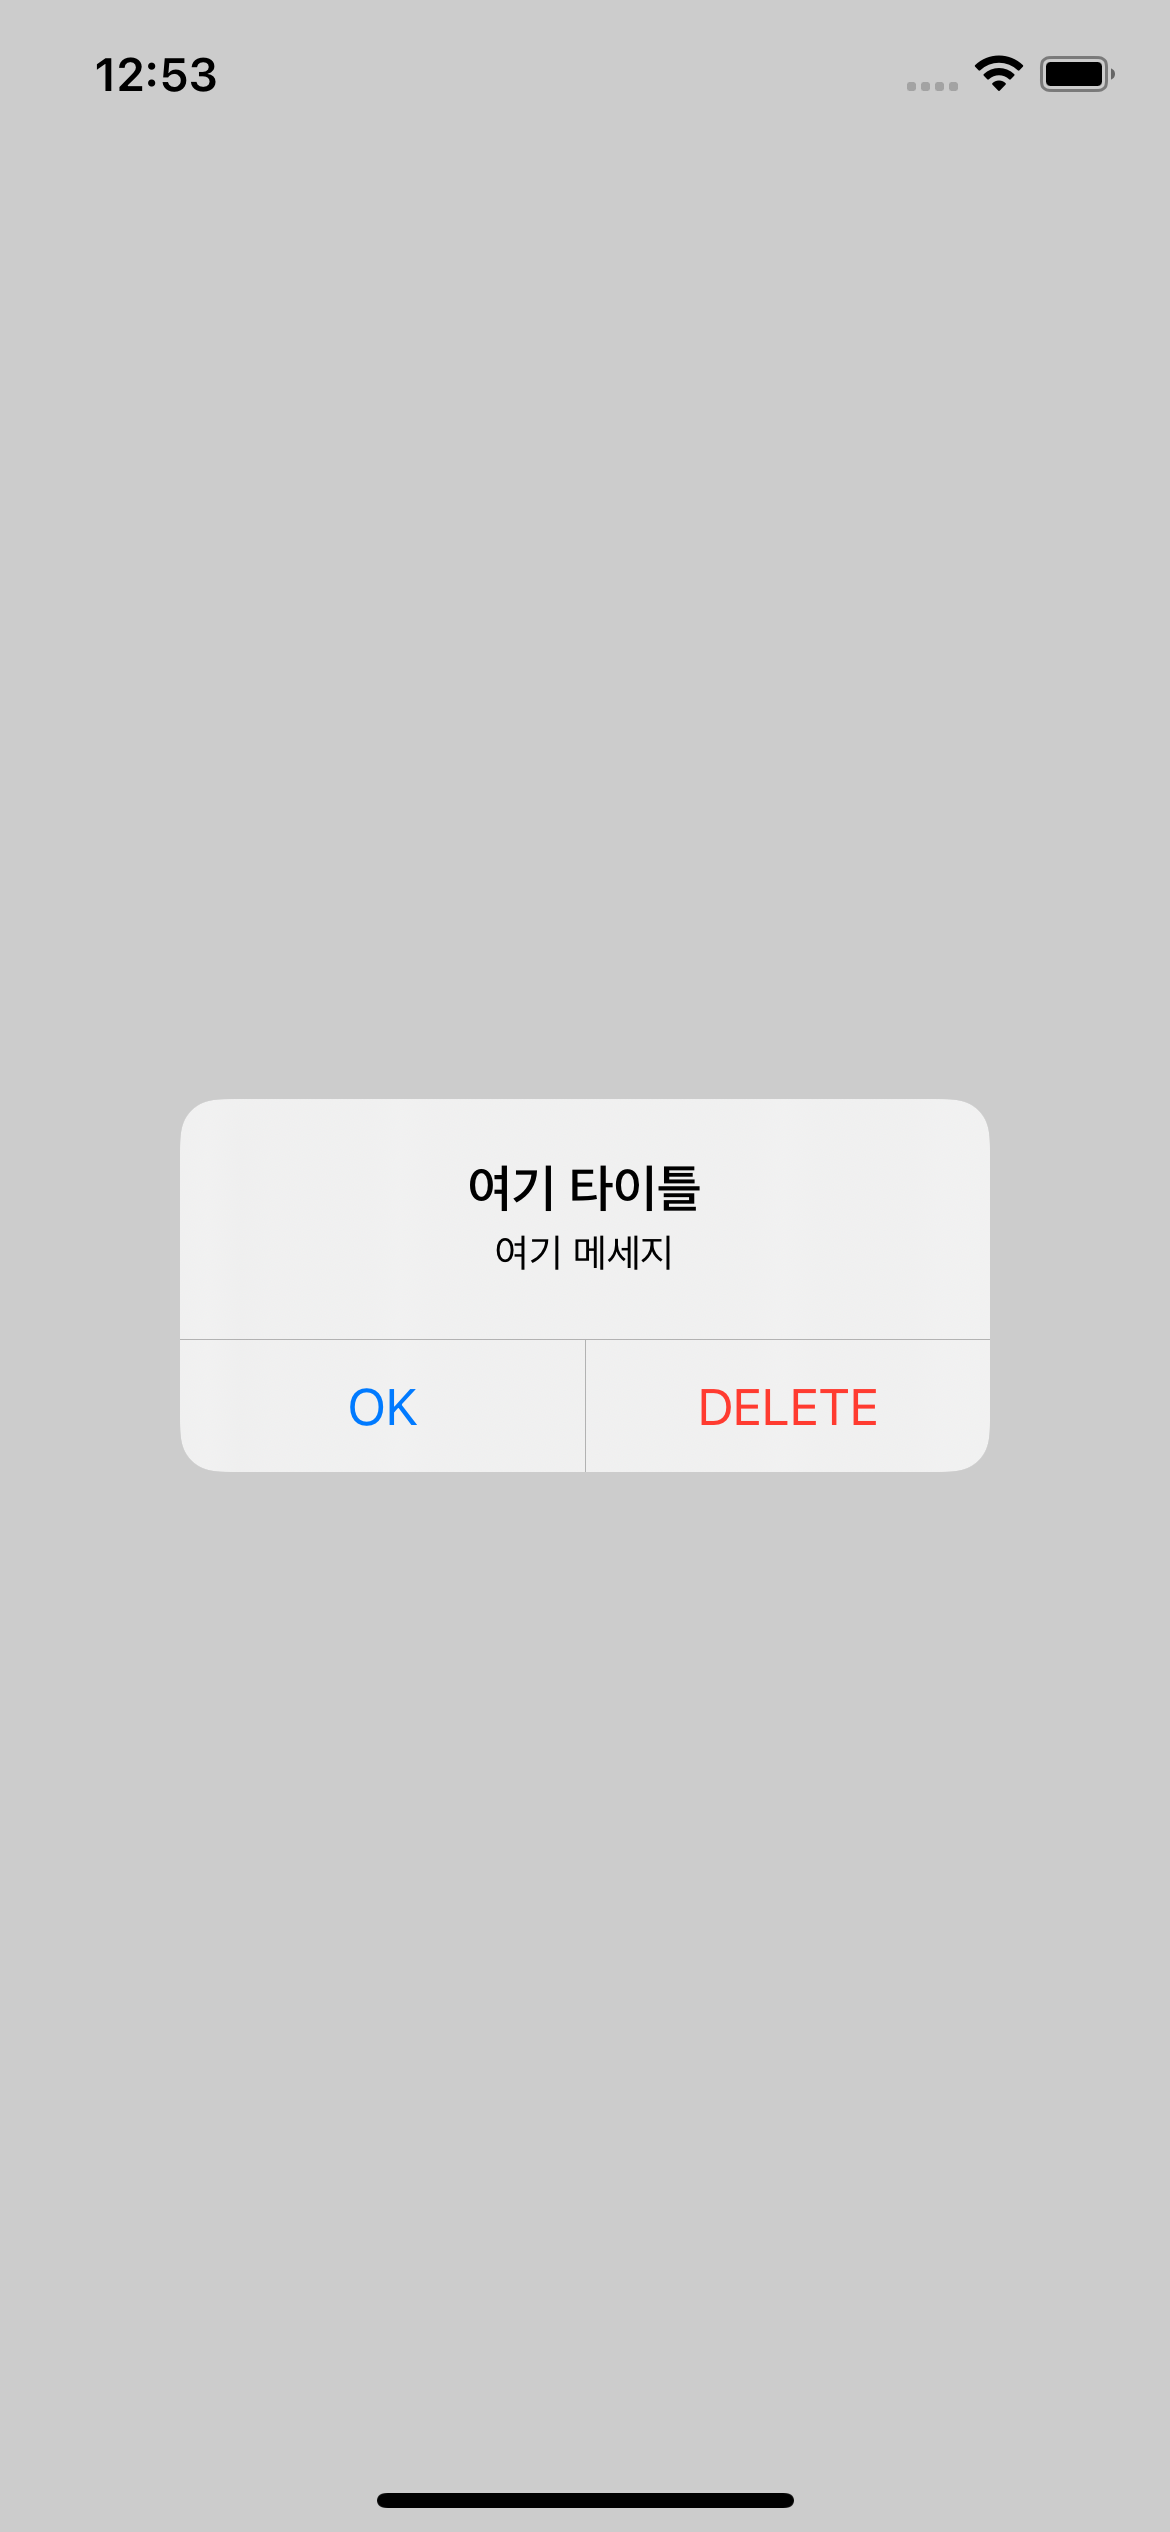
Alert(
title: Text("여기 타이틀"),
message: Text("여기 메세지"),
dismissButton: .default(Text("OK")) {
print("OK 누름")
}
)
}
}
}
뭐 요런식으로 dismissButton만 생성해도되면 위와 같이 구현해서
필요에 따라 이벤트 처리를 하면될 것 같고
아래와 같이 구현할 수도 있으니 참고
struct ContentView: View {
    @State var showingAlert = false

    var body: some View {

        Button("얼럿 생성") {
            showingAlert = true
        }.alert(isPresented: $showingAlert) {
            Alert(
                title: Text("여기 타이틀"),
                message: Text("여기 메세지"),
                primaryButton: .default(
                    Text("OK")
                ),
                secondaryButton: .destructive(
                    Text("DELETE")
                )
            )
        }
    }
}
ㅇㅇ 그렇다
추가로
iOS15 얼럿에 사용되는 버튼에는 Role이라고 적혀있고
iOS14 얼럿에 사용되는 버튼은 Style이라 적혀있었음
destructive와 cancel은 동일함
resource
https://developer.apple.com/documentation/swiftui/alert
https://www.hackingwithswift.com/quick-start/swiftui/how-to-show-an-alert
'개발 > SwiftUI' 카테고리의 다른 글
| SwiftUI - QR코드 생성하기 (2) | 2024.02.18 |
|---|---|
| SwiftUI - Spring Animation (0) | 2022.09.14 |
| SwiftUI - Rectangle, RoundedRectangle (0) | 2022.08.15 |
| SwiftUI - VStack, LazyVStack 비교하기 (4) | 2022.07.31 |
| SwiftUI - Text / 마크다운 (2) | 2022.07.09 |


